アイコン画像をロードしてビットマップデータを操作するテスト
新しいことを覚えると、以前覚えたことを忘れてしまいがちです。
ややもすると、画像のロードの仕方も忘れてしまうのでメモしておくテスト。
アイコンの実寸サイズ表示、拡大表示、データ反転表示のテスト。
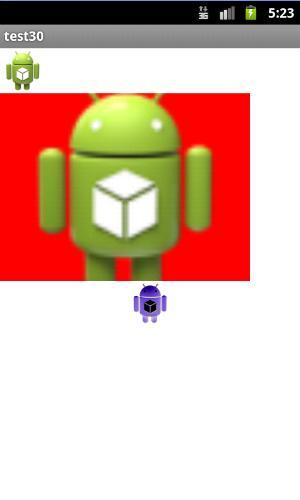
ImageViewにBitmapをセットすると、ImageViewの大きさに合わせて画像を伸縮したり、表示位置合わせができます。
setScaleType(ImageView.ScaleType.CENTER); //中央に表示
setScaleType(ImageView.ScaleType.CENTER_CROP); //余白無しで最大表示
setScaleType(ImageView.ScaleType.CENTER_INSIDE); //余白有りで中央に表示
setScaleType(ImageView.ScaleType.FIT_CENTER); //なるべく中央に大きく表示
setScaleType(ImageView.ScaleType.FIT_XY); //縦横をストレッチして表示
setScaleType(ImageView.ScaleType.FIT_END); //右下に合わせて最大表示
setScaleType(ImageView.ScaleType.MATRIX); //MATRIXを使用
| |
MainActivity.java
package com.example.test30;
import android.os.Bundle;
import android.app.Activity;
import android.graphics.Bitmap;
import android.graphics.BitmapFactory;
import android.graphics.Color;
import android.view.ViewGroup.LayoutParams;
import android.widget.ImageView;
import android.widget.LinearLayout;
public class MainActivity extends Activity {
private final static int WC = LayoutParams.WRAP_CONTENT;
LinearLayout layout1;
Bitmap bmp1,bmp2;
ImageView img1,img2,img3;
@Override
protected void onCreate(Bundle savedInstanceState) {
super.onCreate(savedInstanceState);
layout1=new LinearLayout(this); //レイアウト
layout1.setOrientation(LinearLayout.VERTICAL); //縦に並べる
setContentView(layout1);
int width;
int height;
//--------------------------------------
//アイコン画像をビットマップにロードして、イメージビューにセットして普通に表示
img1 = new ImageView(this);
Bitmap bmp1 = BitmapFactory.decodeResource(getResources(), R.drawable.ic_launcher);
img1.setImageBitmap(bmp1); //ビットマップをImageViewにセット
LayoutParams params1= new LayoutParams(WC,WC); //アイコンサイズに合わせる
img1.setLayoutParams(params1);
layout1.addView(img1); //レイアウトにアイコン画像を追加
//--------------------------------------
//アイコンをイメージビューにロードして、横長に伸ばして表示
img2 = new ImageView(this);
img2.setImageResource(R.drawable.ic_launcher); //アイコンをイメージビューにロード
//img2.setScaleType(ImageView.ScaleType.CENTER); //中央に表示
img2.setScaleType(ImageView.ScaleType.CENTER_CROP); //余白無しで最大表示
//img2.setScaleType(ImageView.ScaleType.CENTER_INSIDE); //余白有りで中央に表示
//img2.setScaleType(ImageView.ScaleType.FIT_CENTER); //なるべく中央に大きく表示
//img2.setScaleType(ImageView.ScaleType.FIT_XY); //縦横をストレッチして表示
//img2.setScaleType(ImageView.ScaleType.FIT_END); //右下に合わせて最大表示
//img2.setScaleType(ImageView.ScaleType.MATRIX); //MATRIXを使用
LayoutParams params2= new LayoutParams(400,300); //横長サイズ
img2.setPadding(10, 10, 10, 10); //四方の余白
img2.setBackgroundColor(Color.argb(255, 255, 0, 0)); //背景の色(赤)
img2.setLayoutParams(params2);
layout1.addView(img2);
//--------------------------------------
//アイコンのビットマップデータを反転して、イメージビューにセットして表示
bmp2 = BitmapFactory.decodeResource(getResources(), R.drawable.ic_launcher);
//ビットマップが編集不可ならコピーする
if (!bmp2.isMutable()) {
bmp2 = bmp2.copy(Bitmap.Config.ARGB_8888, true);
}
width = bmp2.getWidth();
height = bmp2.getHeight();
int[]pixeldata1 =new int[width * height];
bmp2.getPixels(pixeldata1, 0, width, 0, 0, width, height);
for (int y = 0; y < height; y++) {
for (int x = 0; x < width; x++) {
pixeldata1[x + y * width] ^= 0x00ffffff; //データ反転
}
}
bmp2.setPixels(pixeldata1, 0, width, 0, 0, width, height);
img3 = new ImageView(this);
img3.setImageBitmap(bmp2);
layout1.addView(img3);
}
}
| |
アプリ内の画像をロードして、端末内にセーブするテスト
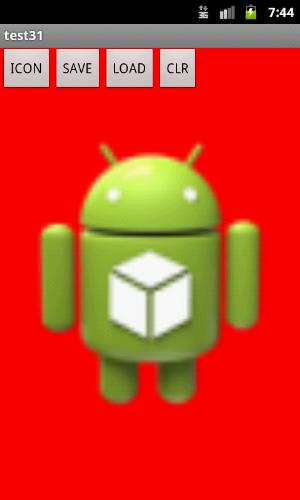
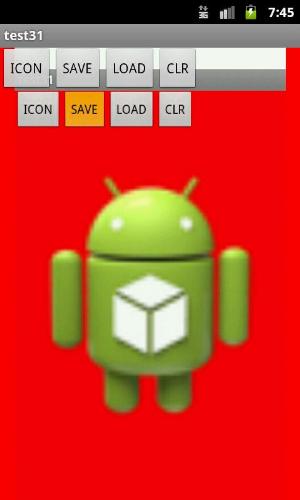
「ICON」ボタンを押すと、アイコンがロードされます。
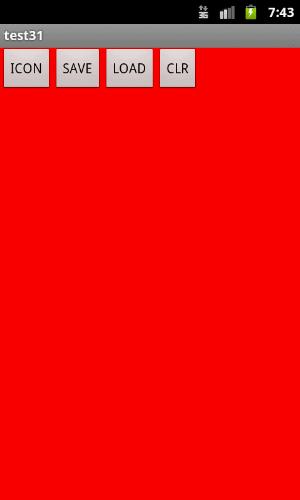
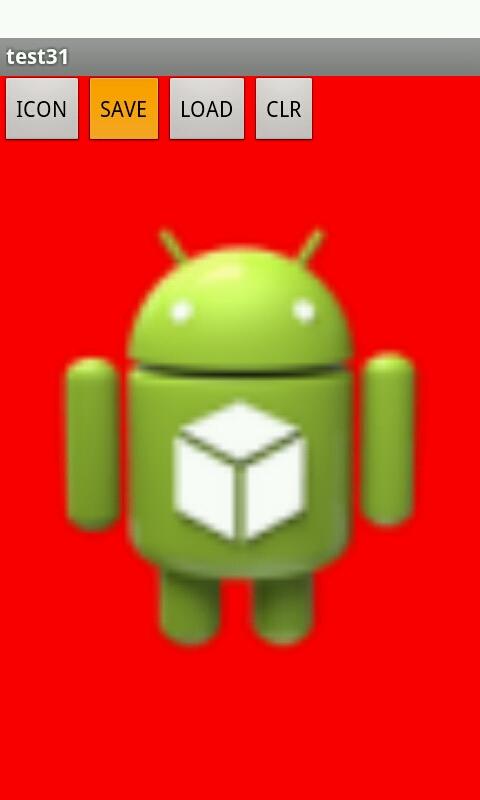
「SAVE」ボタンを押すと、ビューの画像がセーブさます。
キャッシュを利用して、スクリーンショット的な事が出来るというので、テストしてみました。
ステータスバーの部分は、保存できません。
完全なスクリーンショットには、システム権限が必要になります。
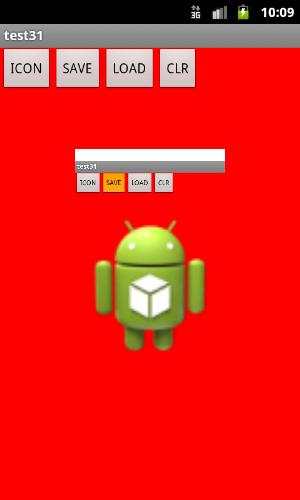
「LOAD」すると、こうなります。
ステータスバーが表示されているので、ロードされた画像は、一回り小さく表示されます。
「CLR」で、クリアされます。
アイコン画像だけでなく、自分の用意した画像もロードできます。
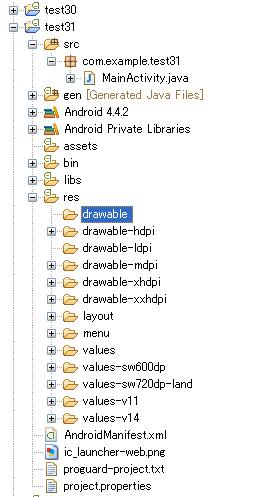
アプリ内で使う画像は、「res/drawable」というフォルダを作って保存しておきます。
「setImageResource(R.drawable.ic_launcher)」の、「R.drawable.」の後を、自分の画像のファイル名に置き換えます。
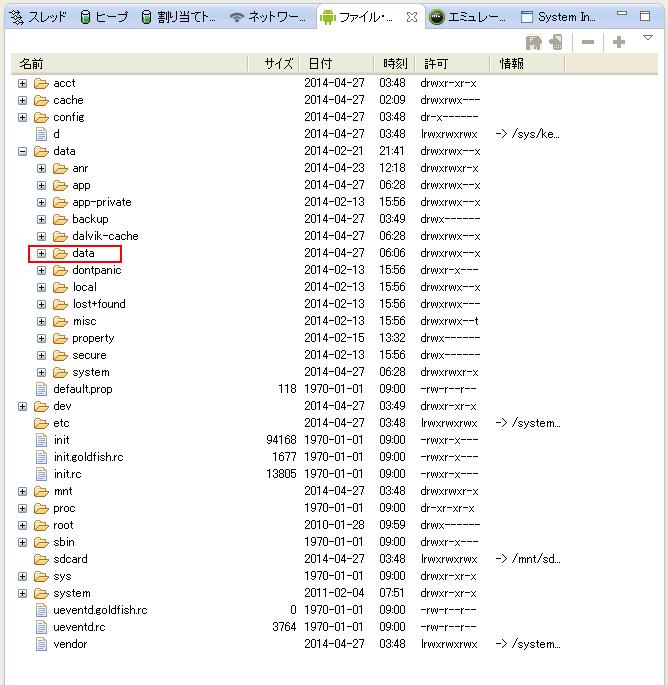
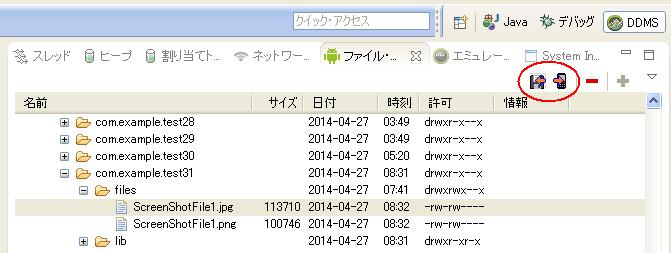
セーブした画像は、端末内の、「data/data/このアプリの名前/files」に、作られます。
DDMSの、ファイル・エクスプローラーで確認できます。
ファイルを選択して、右上のアイコンで、取り出すことができます。
MainActivity.java
package com.example.test31;
import java.io.FileNotFoundException;
import java.io.IOException;
import java.io.InputStream;
import java.io.OutputStream;
import android.os.Bundle;
import android.app.Activity;
import android.content.Context;
import android.graphics.Bitmap;
import android.graphics.BitmapFactory;
import android.graphics.Color;
import android.view.View;
import android.view.ViewGroup.LayoutParams;
import android.widget.Button;
import android.widget.ImageView;
import android.widget.LinearLayout;
import android.widget.RelativeLayout;
import android.view.View.OnClickListener;
public class MainActivity extends Activity {
static final int MP = LayoutParams.MATCH_PARENT ;
RelativeLayout R_layout1;
ImageView image1;
@Override
protected void onCreate(Bundle savedInstanceState) {
super.onCreate(savedInstanceState);
//-----------------------------------------
//レイアウト
R_layout1 = new RelativeLayout(this);
setContentView(R_layout1);
//背景画像用イメージビュー
image1 = new ImageView(this);
image1.setBackgroundColor(Color.argb(255, 255, 0, 0)); //背景の色(赤)
image1.setScaleType(ImageView.ScaleType.FIT_CENTER);
LayoutParams params1= new LayoutParams(MP,MP);
image1.setLayoutParams(params1);
R_layout1.addView(image1);
//-----------------------------------------
//ボタン
LinearLayout L_layout1 = new LinearLayout(this);
Button button1 = new Button(this);
button1.setText("ICON");
L_layout1.addView(button1);
Button button2 = new Button(this);
button2.setText("SAVE");
L_layout1.addView(button2);
Button button3 = new Button(this);
button3.setText("LOAD");
L_layout1.addView(button3);
Button button4 = new Button(this);
button4.setText("CLR");
L_layout1.addView(button4);
R_layout1.addView(L_layout1);
//-----------------------------------------
button1.setOnClickListener( new OnClickListener() {
//アイコンをイメージビューにロード
@Override
public void onClick(View v) {
image1.setImageResource(R.drawable.ic_launcher);
}
});
//-----------------------------------------
button2.setOnClickListener( new OnClickListener() {
//このアプリのスクリーンショット
@Override
public void onClick(View v) {
ScreenShot1();
}
});
//-----------------------------------------
button3.setOnClickListener( new OnClickListener() {
//ロード
@Override
public void onClick(View v) {
LoadImage1();
}
});
//-----------------------------------------
button4.setOnClickListener( new OnClickListener() {
//クリア
@Override
public void onClick(View v) {
clearimage1();
}
});
//-----------------------------------------
}
private boolean ScreenShot1(){
View view = R_layout1.getRootView();
String filename = "ScreenShotFile1";
try {
OutputStream out = openFileOutput(filename + ".jpg", Context.MODE_PRIVATE);
view.setDrawingCacheEnabled(true);
Bitmap bmp = Bitmap.createBitmap(view.getDrawingCache());
view.setDrawingCacheEnabled(false);
bmp.compress(Bitmap.CompressFormat.JPEG, 100, out); //JPEG保存
out.close();
//--------------------
OutputStream output = openFileOutput(filename + ".png", Context.MODE_PRIVATE);
bmp.compress(Bitmap.CompressFormat.PNG, 100, output); //PNG保存
output.close();
return true;
} catch (FileNotFoundException e) {
e.printStackTrace();
return false;
} catch (IOException e) {
e.printStackTrace();
return false;
}
}
private void LoadImage1(){
String filename = "ScreenShotFile1";
try {
InputStream inputStream = openFileInput(filename + ".jpg");
Bitmap bmp = BitmapFactory.decodeStream(inputStream);
image1.setImageBitmap(bmp);
} catch (FileNotFoundException e) {
e.printStackTrace();
}
}
private void clearimage1(){
image1.setImageDrawable(null);
}
}
| |
SDカードの画像をロードして、SDカードにセーブするテスト
上記の方法での端末内部のファイル読み書きの場合、パスは、「/data/data/このアプリの名前/files/」固定です。
SDカードへの読み書きは、SDカードのファイルパスを指定することで可能です。
が、機種によって、SDカードの場所が内部だったり外部だったりするようです。
詳しいことは難しい話しになるので、ここでは割愛します。
エミュレーターでは、SDカードの場所は「/mnt/sdcard/」です。
ロードする時に、画像のサイズを取得して、半分のサイズに縮小して表示しています。
セーブ、ロードの関数は、それぞれ、下記のものと入れ替える。
private boolean ScreenShot2(){
//SDカードがあるか?
if(To_Chk_SD1()==false)
return false;
View view = R_layout1.getRootView();
String filename = "ScreenShotFile1";
File file = Environment.getExternalStorageDirectory();
String path = file.getPath();
filename = path + "/" + filename;
try {
FileOutputStream out = new FileOutputStream(filename + ".jpg");
view.setDrawingCacheEnabled(true);
Bitmap bmp = Bitmap.createBitmap(view.getDrawingCache());
view.setDrawingCacheEnabled(false);
bmp.compress(Bitmap.CompressFormat.JPEG, 100, out); //JPEG保存
out.close();
//--------------------
FileOutputStream output = new FileOutputStream(filename + ".png");
bmp.compress(Bitmap.CompressFormat.PNG, 100, output); //PNG保存
output.close();
return true;
} catch (FileNotFoundException e) {
e.printStackTrace();
return false;
} catch (IOException e) {
e.printStackTrace();
return false;
}
}
private void LoadImage2(){
String filename = "ScreenShotFile1";
File file = Environment.getExternalStorageDirectory();
String path = file.getPath();
filename = path + "/" + filename + ".png";
BitmapFactory.Options option = new BitmapFactory.Options();
option.inJustDecodeBounds = true; //画像の情報だけ読みとり指定
BitmapFactory.decodeFile( filename, option );
//画像サイズが取得できるので適当に利用する
int bmpwidth = option.outWidth;
int bmpheight = option.outHeight;
int bmpscale = 2; //大きな画像は、縮小サイズで読み込み
option.inSampleSize = bmpscale;
option.inJustDecodeBounds = false; //画像本体を読み込み指定
Bitmap bmp = BitmapFactory.decodeFile( filename, option );
image1.setScaleType(ImageView.ScaleType.CENTER); //元のサイズで中央に表示
image1.setImageBitmap(bmp);
}
public boolean To_Chk_SD1(){
//ファイルセーブ可能か?
boolean mExternalStorageAvailable = false;
boolean mExternalStorageWriteable = false;
String state = Environment.getExternalStorageState();
if (Environment.MEDIA_MOUNTED.equals(state)) {
mExternalStorageAvailable = mExternalStorageWriteable = true;
} else if (Environment.MEDIA_MOUNTED_READ_ONLY.equals(state)) {
mExternalStorageAvailable = true;
mExternalStorageWriteable = false;
} else {
mExternalStorageAvailable = mExternalStorageWriteable = false;
}
return mExternalStorageWriteable;
}
| |
AndroidManifest.xmlの確認
SDカードに書き込み可能にするためには、AndroidManifest.xmlに、次の記述が必要になります。
これを忘れるとセーブできません。
<uses-permission android:name="android.permission.WRITE_EXTERNAL_STORAGE"/>
| |
<?xml version="1.0" encoding="utf-8"?>
<manifest xmlns:android="http://schemas.android.com/apk/res/android"
package="com.example.test31"
android:versionCode="1"
android:versionName="1.0" >
<uses-sdk
android:minSdkVersion="8"
android:targetSdkVersion="18" />
<uses-permission android:name="android.permission.WRITE_EXTERNAL_STORAGE"/>
<application
android:allowBackup="true"
android:icon="@drawable/ic_launcher"
android:label="@string/app_name"
android:theme="@style/AppTheme" >
<activity
android:name="com.example.test31.MainActivity"
android:label="@string/app_name" >
<intent-filter>
<action android:name="android.intent.action.MAIN" />
<category android:name="android.intent.category.LAUNCHER" />
</intent-filter>
</activity>
</application>
</manifest>
| |
メモ
Bitmapから、ImageViewへ。
image1.setImageBitmap(bmp);
| |
ImageViewから、Bitmapへ。
BitmapDrawable bmpdb = (BitmapDrawable)image1.getDrawable();
Bitmap bmp = bmpdb.getBitmap();
| |
リソースから、Bitmapへ。
Bitmap bmp1 = BitmapFactory.decodeResource(getResources(), R.drawable.ic_launcher);
| |
ファイルから、Bitmapへ。
Bitmap bmp = BitmapFactory.decodeFile( filename );
//オプション指定
BitmapFactory.Options option = new BitmapFactory.Options();
Bitmap bmp = BitmapFactory.decodeFile( filename, option );
| |
Bitmapから、ファイルへ。
FileOutputStream out = new FileOutputStream(filename + ".jpg");
bmp.compress(Bitmap.CompressFormat.JPEG, 100, out); //JPEG保存
out.close();
| |
リソースから、Drawableへ。
Drawable drawable = getResources().getDrawable(R.drawable.ic_launcher);
| |
Bitmapから、Drawableへ。
Drawable drawable = new BitmapDrawable(getResources(), bmp);
| |
Drawable から、Bitmapへ。
import android.graphics.drawable.BitmapDrawable;
Bitmap bmp = ((BitmapDrawable) drawable).getBitmap();
| |
端末内のデータ格納用のfilesのパス。
File path = getFilesDir();
filename = path + "/" + filename + ".png";
| |
SDカードのパス。
File file = Environment.getExternalStorageDirectory();
String path = file.getPath();
filename = path + "/" + filename + ".png";
| |
Bitmapとして開けない?
InputStream inputStream = openFileInput(filename);
Bitmap bmp = BitmapFactory.decodeStream(inputStream);
if(bmp == null)
return false;
| |
Bitmapを作る
Bitmap bmp = Bitmap.createBitmap(480, 800, Bitmap.Config.ARGB_8888);
| |
OutOfMemoryError?
bitmap.recycle();
bitmap = null;
image1.setImageBitmap(null);
image1.setImageDrawable(null);
System.gc();
| |